
Marketing Cloud Engagement
Email Marketing, Mobile and Advertising
Build customer relationships with an engagement marketing platform that orchestrates every moment and harmonizes messages into cohesive journeys, creating a unified brand experience for each customer. Activate your data to enhance message relevance, personalize campaigns, and improve customer lifetime value.


What can you do with an engagement marketing platform?
Create and deliver integrated campaigns, personalizing every interaction across any channel, with AI-powered decision-making optimizing every step of the way.
Manage and personalize email programs at scale.
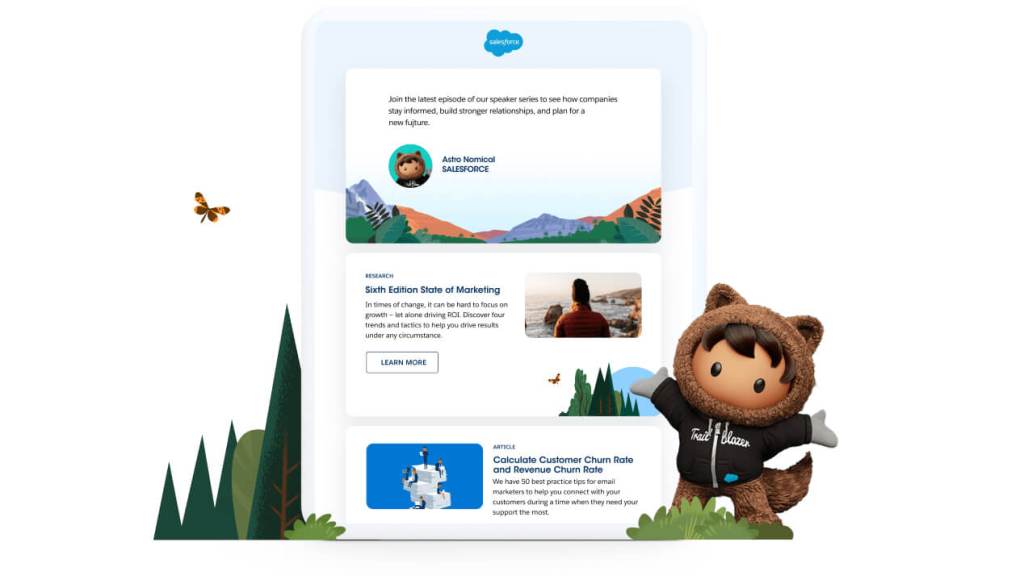
Reach the right subscriber at the right time — every time. Build and deliver personalized email, from basic newsletters to complex campaigns. Create reusable content blocks, including text, HTML, images, buttons, dynamic content, and A/B testing. Use integrated message types to deliver promotional, transactional, and triggered messages in a single journey. Track and optimize email performance in real time and manage your sender reputation score, all within a single platform.
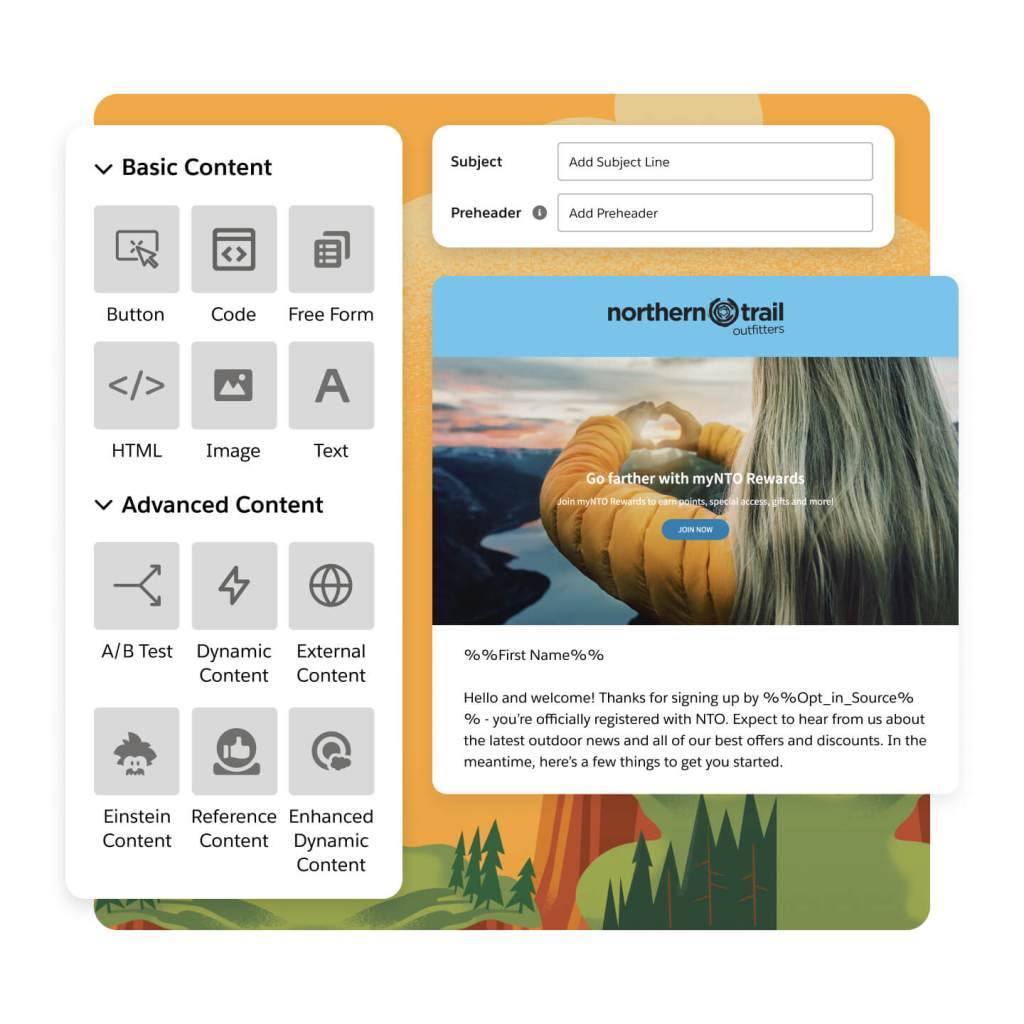
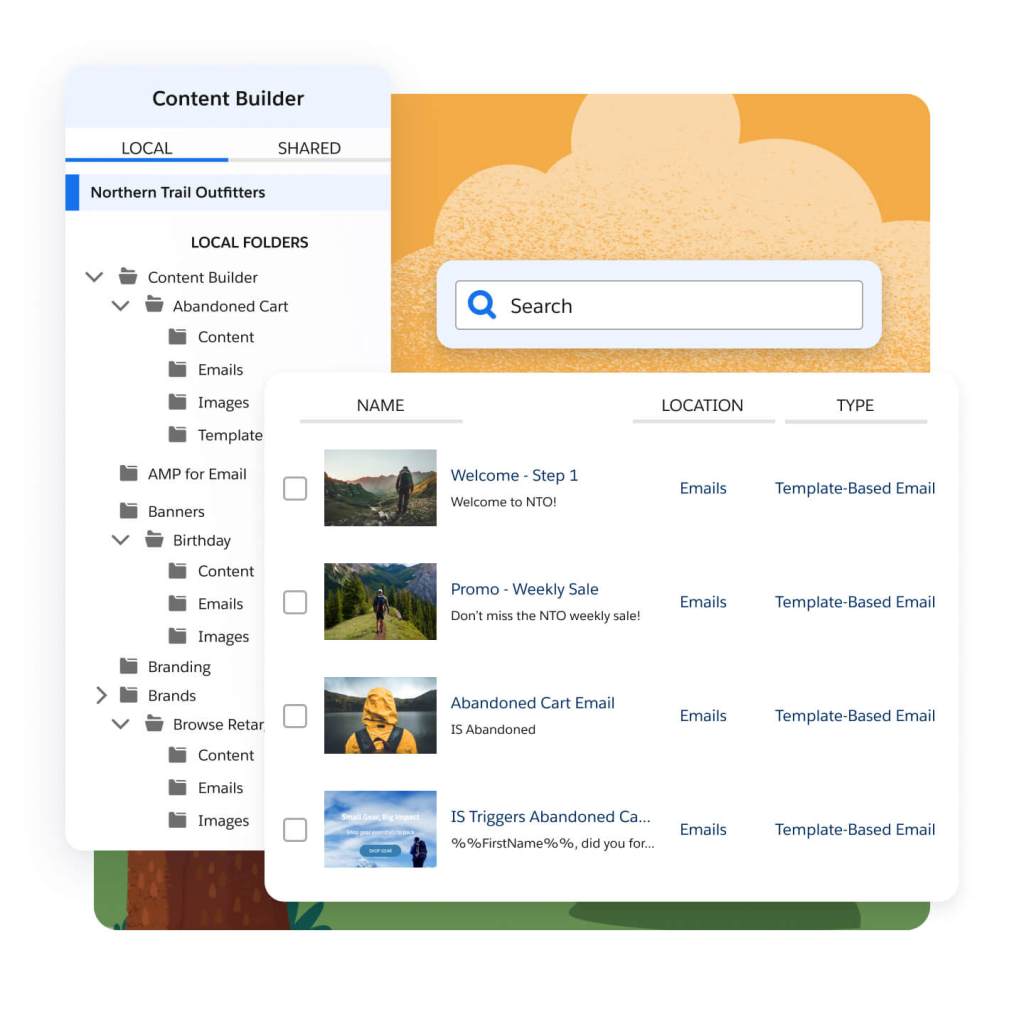
Build and customize attention-grabbing emails with a user-friendly, drag-and-drop interface. Upload files, design your own, or choose from prebuilt templates to be shared across departments. Keep images, documents, and content in a single location for use within Marketing Cloud. Develop emails faster with code snippets to create nested tags for deeper personalization. Keep your content library clean by recycling content, and get proper signoff fast with the Approvals feature.
Grow every email campaign with greater reliability and performance. With industry-leading send volume, scale your email messages and campaigns — even complex content that relies on AI-powered decision-making and leverages dynamic content blocks. And, scale high-velocity data ingestion and automate workflow patterns across the entire customer lifecycle.
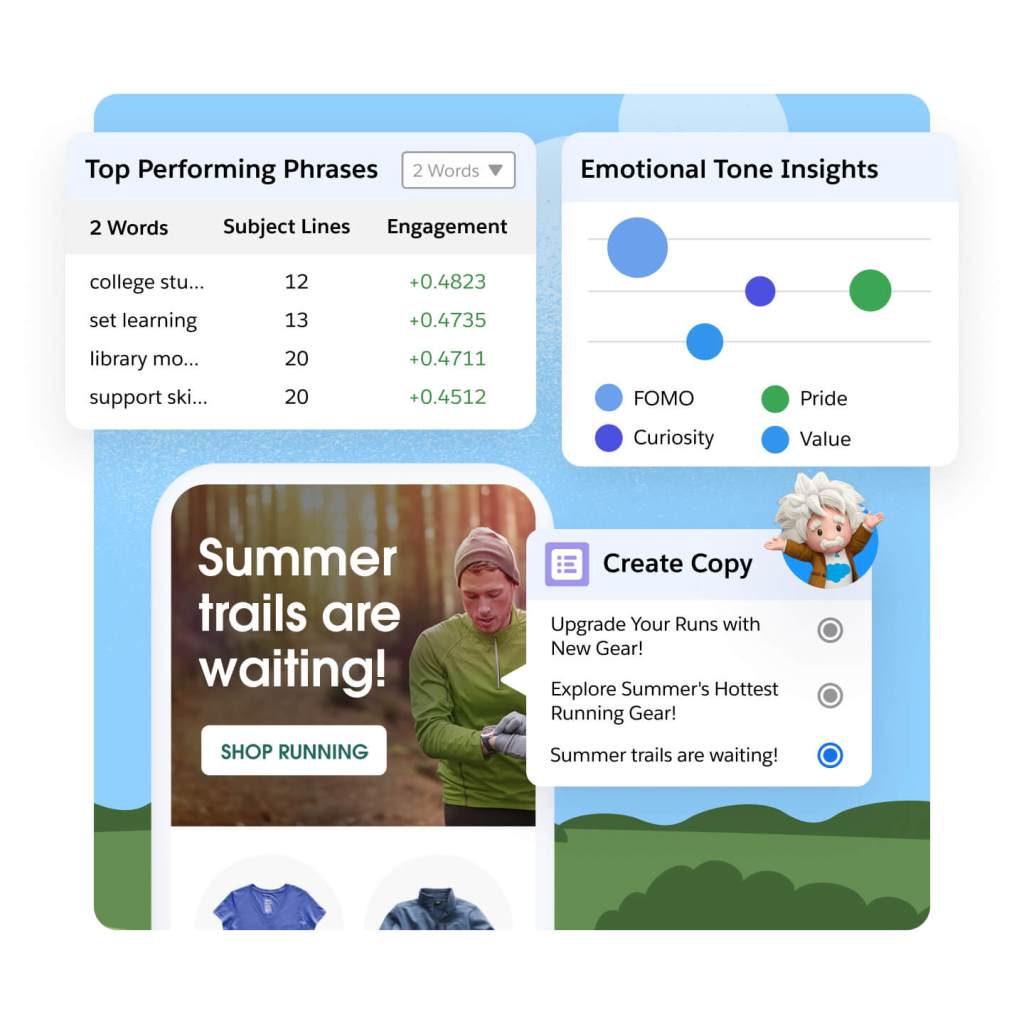
Innovate with AI in the inbox using predictive and generative AI tools. Generate persuasive email subject lines and body copy that incorporate brand voice and tone. Personalize send times, messaging frequency, product recommendations, and email content for each subscriber based on their likelihood to engage. And, optimize subject lines, email performance, and important KPIs with AI-powered insights.
Deliver cohesive customer experiences across mobile channels.
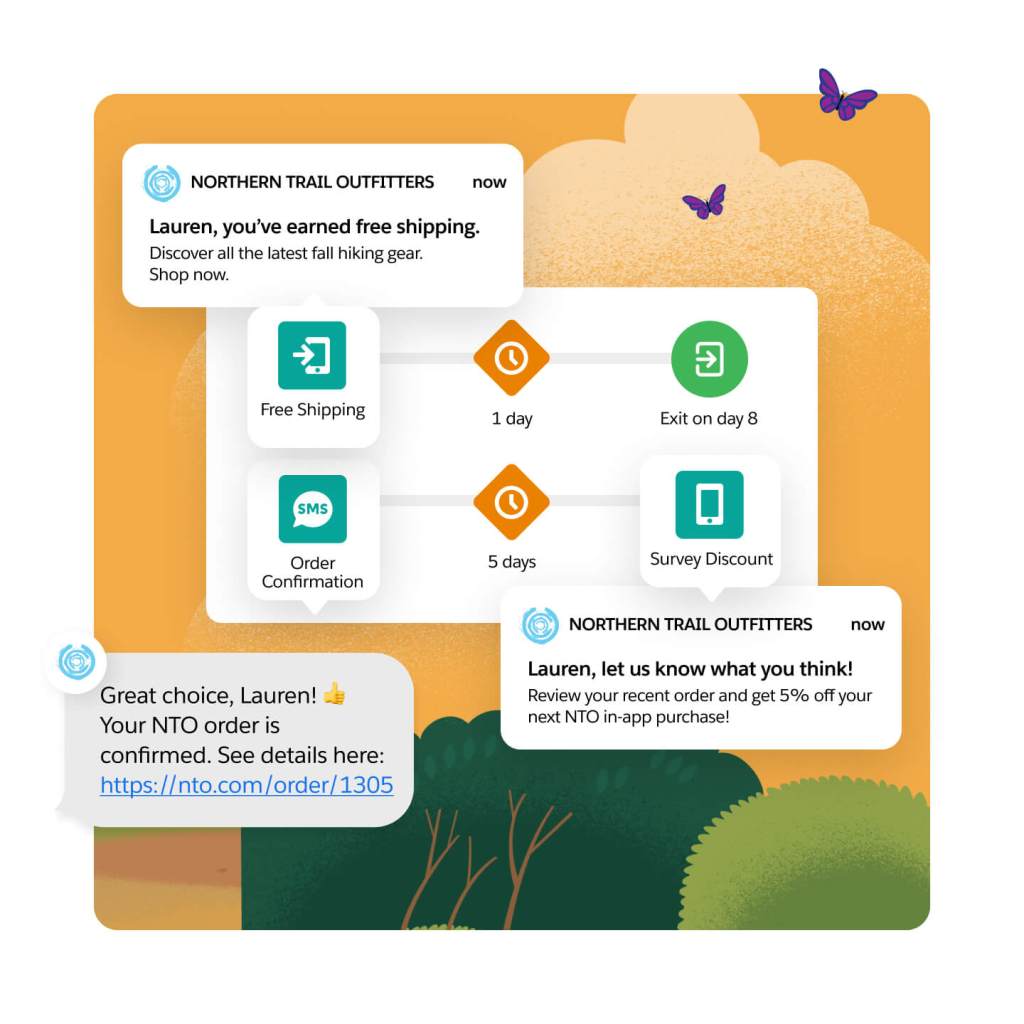
Seamlessly connect with your audience wherever they are. Deliver a connected marketing experience, with AI-powered decisioning, to better engage your customers across SMS, third-party messaging, and mobile push. Design, build, and deploy those moments, all in one central console. Learn more about your customers by interacting with them through conversational marketing for engagements like appointment confirmations, surveys, or building user preferences — all while delivering impactful experiences that build strong, brand-customer relationships.
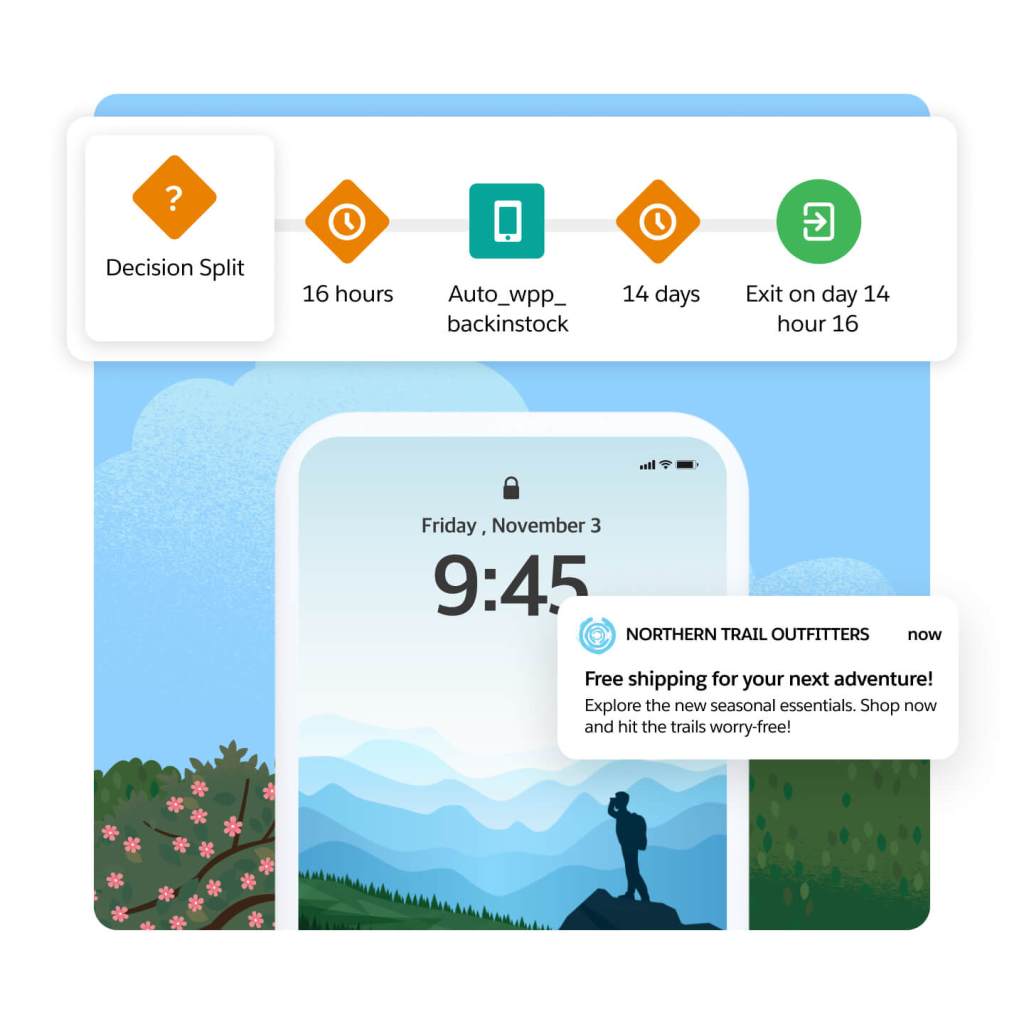
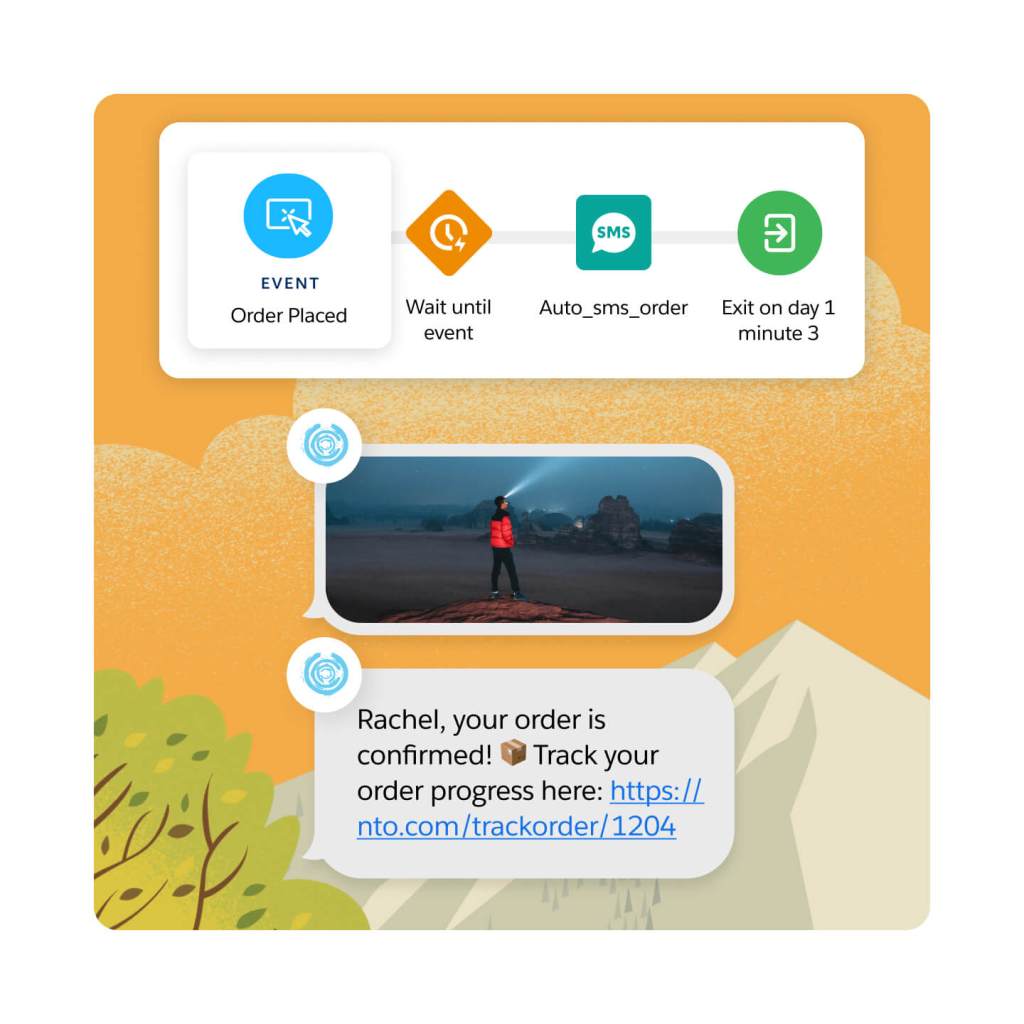
Drive user engagement with integrated in-app capabilities. With push messaging, you can use geotargeting or behavioral data to deliver relevant and timely messages that maximize both app engagement and ROI. Reach your customers on their preferred channels, leveraging Journey Builder, Data Cloud, API Triggers, and geolocations to deliver timely messages across any use case. Send timely information, such as event-based engagement, to drive valuable interactions. Grow loyalty with responsive retargeting for a more personalized experience.
Transform mobile moments with WhatsApp conversational marketing. Meta’s WhatsApp Business Platform helps you reach a global audience with rich, high-quality, and highly engaging messaging experiences, all managed within Marketing Cloud. Connect marketing, commerce, and service interactions seamlessly on a unified platform, powered by Data Cloud.

Manage, track, and optimize SMS messages all within Marketing Cloud. Send alerts and transactional messages to subscribers using templates and a drag-and-drop interface. Engage in real time with time-sensitive notifications, using AI-powered insights for optimal timing and preferred channels.
Design and deliver connected journeys across the lifecycle.
Build and deploy personalized journeys that build customer relationships at every step. Use a drag-and-drop interface to create journeys easily — with messaging, content, and AI decision-making built into a single workflow. And, stay top of mind for your customers by automating experiences like cross-sell or upsell opportunities — using data from various sources or API triggers.

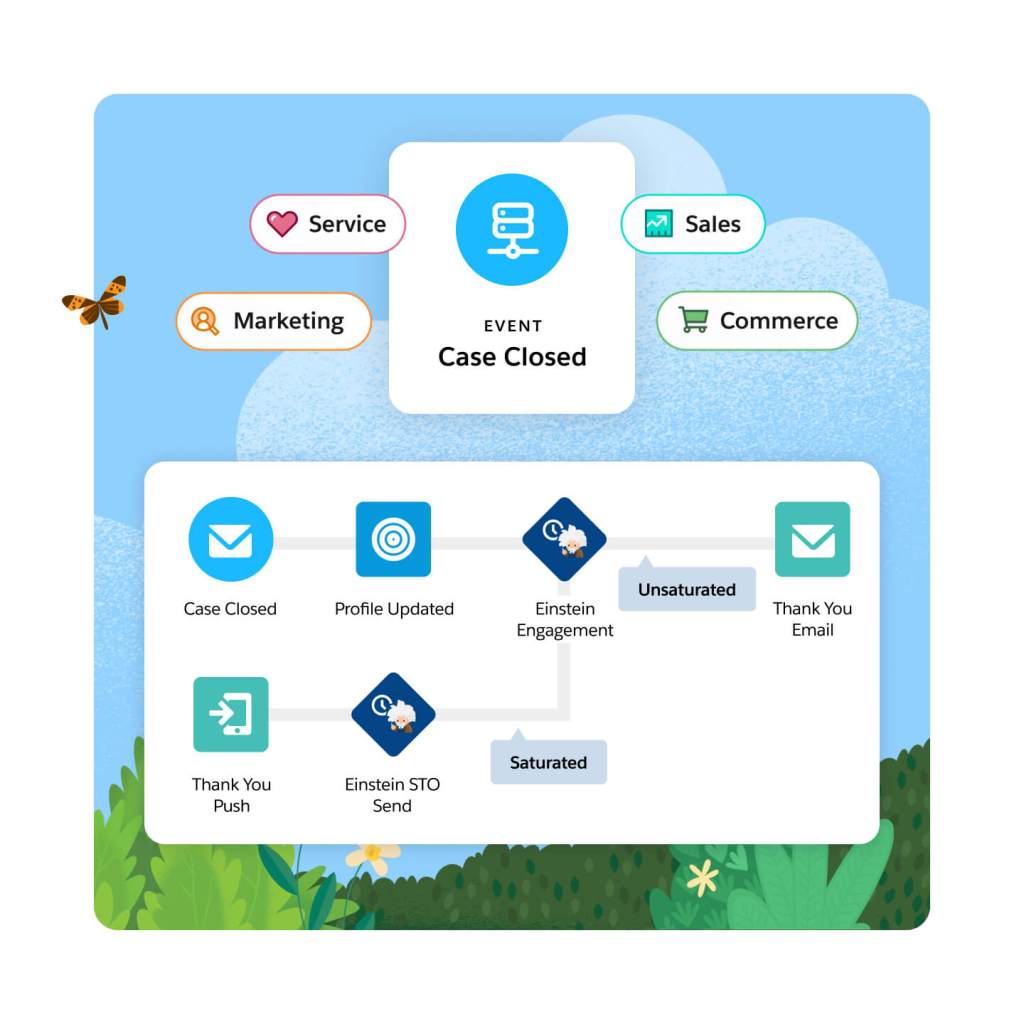
With native integrations across Salesforce products, you can build connected journeys — across marketing channels, service centers, sales teams, or loyalty programs. Use prebuilt activities within Journey Builder, or create your own custom activity, to ensure a unified customer experience. And trigger relevant engagement across your business all from Marketing Cloud, like a service center follow up after a negative customer survey, for example.
Power personalized customer acquisition and conversion campaigns with first-party data. Activate audience segments across the digital ad ecosystem, including Google, Meta, Twitter, and more. Find new customers resembling your highest-value audiences, and suppress ads for existing customers to prevent fatigue. Launch advertising-specific campaigns, or add advertising within existing customer journeys for connected cross-channel experiences.

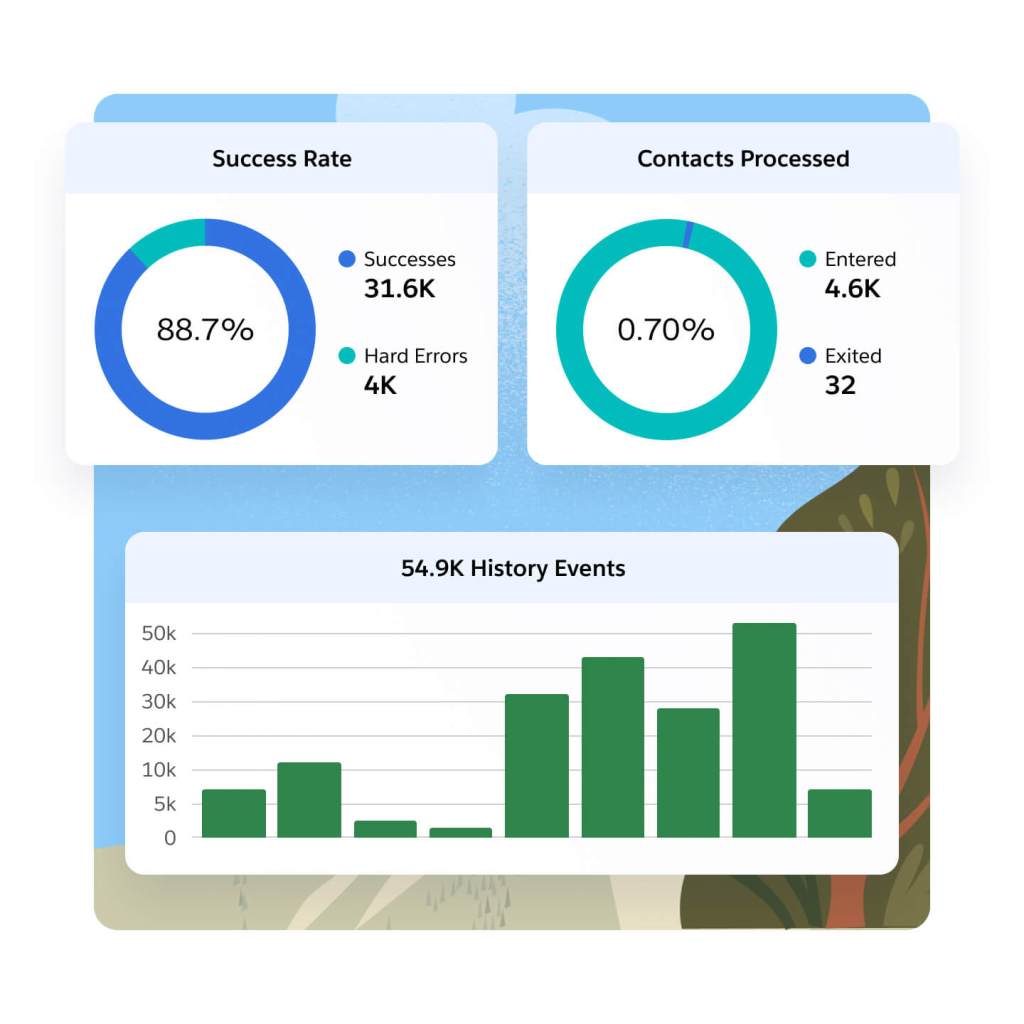
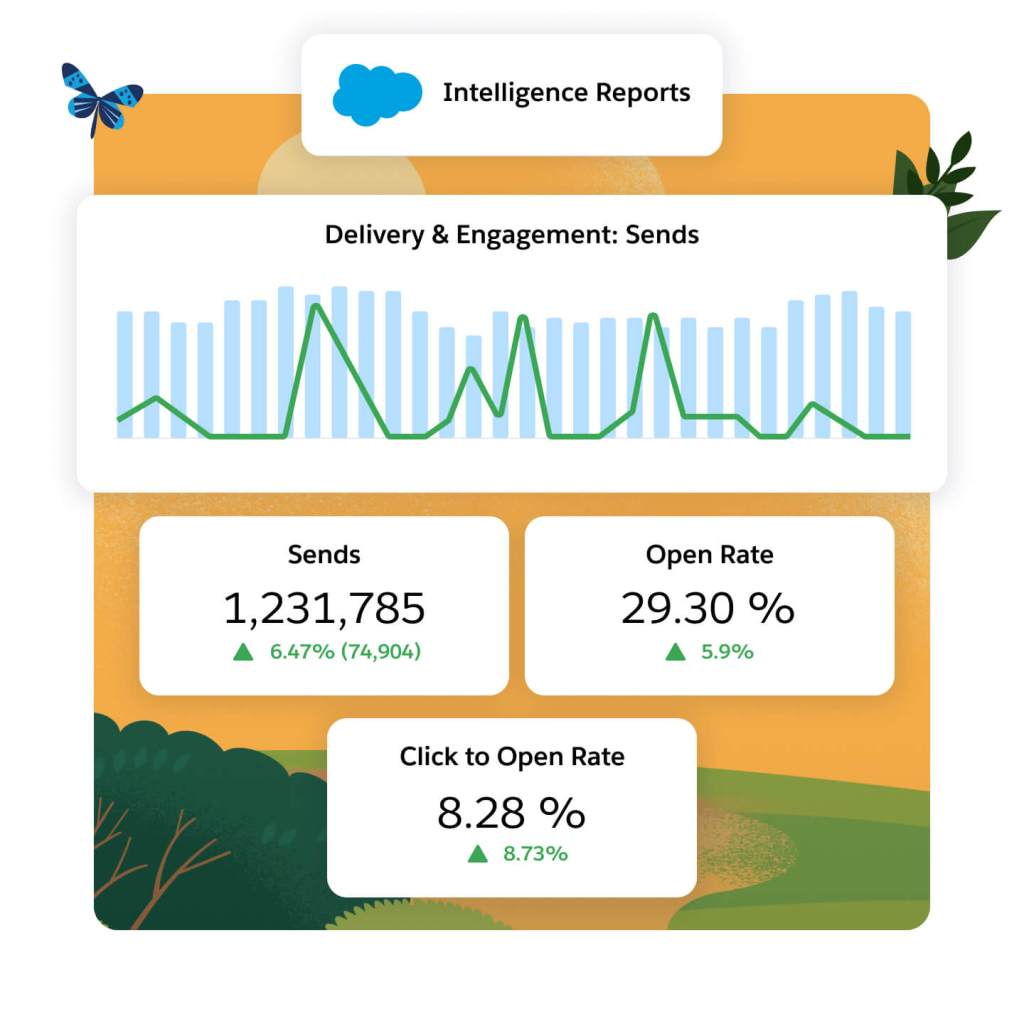
Analyze journey performance with built-in dashboards to optimize campaigns across email, mobile, and advertising. With easy filtering, sorting, and grouping capabilities, you can build custom reports and easily share insights with key stakeholders. Use performance data to optimize campaigns, increase engagement, and grow customer lifetime value.
Extend the power of Marketing Cloud Engagement with these related products.
Data Cloud for Marketing
Activate your data, scale insights with AI, and unify all your data into a single customer profile.
Marketing Cloud Personalization
Automate dynamic offers for each customer in real time across each moment in the customer journey.
Marketing Cloud Intelligence
Optimize marketing performance and spend across every campaign, channel, and journey.
Loyalty Management
Nurture relationships and create lasting loyalty on the world’s #1 CRM.
Find the right Marketing Cloud Engagement edition for your business needs.
Professional
Personalized marketing automation
$
1,250
org/USD/month*
(billed annually)
- Email Marketing
- Content Creation
- Robust analytics
Corporate
Personalized cross-channel strategic marketing
$
4,200
org/USD/month*
(billed annually)
- Journey Orchestration
- Mobile Messaging
- AI-Powered Insights
Enterprise
Sophisticated journeys across channels, brands, and geographies
Request a quote
Price based on contact and message volume
- Journey Orchestration
- Multiple Business Units
- Global platform
This page is provided for information purposes only and subject to change. Contact a sales representative for detailed pricing information.


Stay up to date on all things marketing.
Sign up for our monthly marketing newsletter to get the latest research, industry insights, and product news delivered straight to your inbox.
Learn new skills with free, guided learning on Trailhead.

Hit the ground running with marketing tips, tricks, and best practices.


Ready to take the next step?
Talk to an expert.
Tell us a bit more so the right person can reach out faster.
Stay up to date.
Get the latest research, industry insights, and product news delivered straight to your inbox.

Marketing Cloud Engagement FAQ
A marketing engagement platform helps marketers, businesses, and brands create and implement strategies to engage with their customers and build long-term relationships. It combines various marketing channels, like email, mobile messaging, chat apps (WhatsApp), and more with campaign management to engage with customers throughout their journey, from initial awareness to post-purchase engagement.
Engagement marketing platforms provide features such as customer segmentation, personalized messaging, social media integration, email marketing automation, analytics, and campaign management. The goal is to create meaningful engagement, drive customer connect, and build loyalty by delivering relevant and valuable content or experiences.
Marketing Engagement platforms enable brands to build loyal customer relationships with a range of marketing activities, including lead generation, customer retention, brand advocacy, and upselling/cross-selling. Using an engagement marketing platform effectively, businesses can enhance customer satisfaction, strengthen brand loyalty, and ultimately drive growth and revenue.
Choose the engagement platform that best suits your business's needs, aligns with your goals, and empowers you to execute effective and successful marketing campaigns across multiple channels. Key considerations include native connectivity to your data as well as marketing, commerce, and service experiences, channel breadth, flexibility to manage simple and complex journeys, native measurement tools, embedded AI, customer support and training resources, reputation (for example analyst reports and product reviews), as well as dependability and scalability.
Marketing Engagement is the evolution of ExactTarget platform that was acquired by Salesforce. Marketing Engagement has greatly expanded on the original ExactTarget features and functionalities and incorporates additional messaging, data integrations, channels, and AI capabilities.
Journey Builder is the campaign management tool at the heart of Marketing Engagement, with several embedded, marketer-friendly AI features like send-time optimization, engagement frequency, and multi-variant testing. With pre-build Journey templates, customers are able to get started sending promotional and transactional emails, mobile messages, like push and SMS, and any custom channels quickly.
Advertising Studio is one of the channels that can be used for audience activation in Marketing Engagement. Advertising audience targets can be added into journeys along with email, mobile messages, and so on, and can be added or removed from an audience based on engagement within the journey. Advertising supports audience mapping to Google, Facebook, Instagram, YouTube, Snapchat, LinkedIn and Twitter, as well as customer integrations.